Are you drowning in a sea of unread emails? Is your inbox a constant source of stress and distraction? You’re not alone! Many of us struggle to keep up with the overwhelming number of emails we receive each day.
In this post, we’ll show you a simple and effective way to quickly mark all your emails as read in Gmail. No more feeling overwhelmed or missing important messages. Let’s explore and get your inbox under control!
Why Should You Mark All Emails As Read In Gmail?
Marking all emails as read in Gmail can dramatically reduce the visual clutter and stress associated with a burgeoning inbox. This action simplifies your email management by visually prioritizing messages that need your attention. Here are several reasons why you might want to consider this approach:
- Enhanced Productivity: With a cleaner inbox, it’s easier to focus on emails that require immediate action, allowing for better time management.
- Reduced Stress: A high number of unread emails can be overwhelming and stressful. Clearing them out can provide a psychological boost and a sense of order.
- Prevent Overlooking Important Emails: Sometimes important emails can get lost in a sea of unread messages. By marking all as read, you can start afresh and organize your inbox more effectively.
- Efficiency in Email Processing: This method helps in quickly processing large volumes of emails, which is particularly useful in professional settings where prompt email management is crucial.
How To Mark All Emails As Read In Gmail?
Marking all your emails as read in Gmail can be accomplished easily across various devices. Below are the step-by-step instructions for desktops, Android devices, and iPhones.
Using Desktop
To mark all your emails as read in your Gmail inbox on a desktop, follow these steps:
- Open Gmail in your web browser.
- At the top left corner of your inbox, click the checkbox. This will select all the conversations on the current page (up to 50 emails).
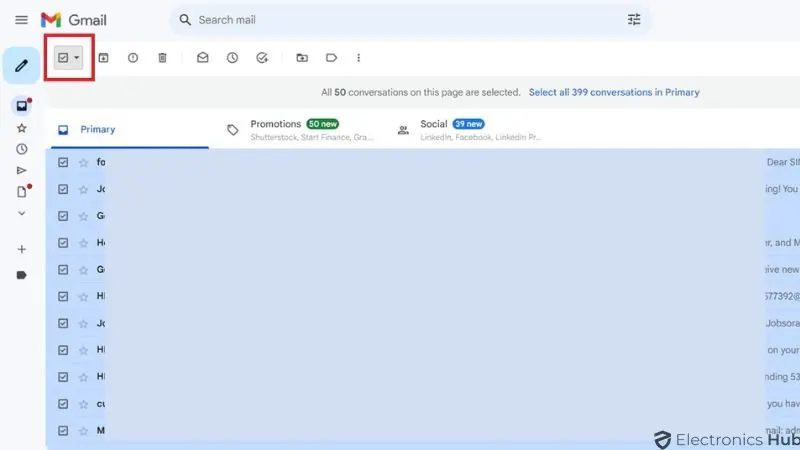
- Gmail will display a dropdown menu next to the checkbox.
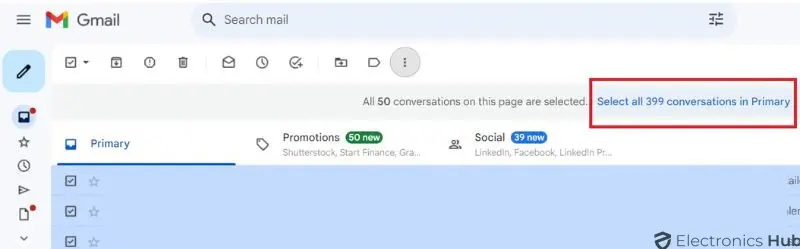
- Click on “Select all conversations that match this search.”
- Once everything is selected, click the “Mark as read” icon (an envelope with a checkmark) at the top of your inbox.
![]()
And you’re done! All your unread emails in the inbox will now be marked as read.
Using Android
Marking all emails as read on Android is straightforward, though it won’t allow you to select every email at once. Here’s a step-by-step guide:
- Open the Gmail app on your Android device.
- Tap on the three horizontal lines in the top left corner.

- Scroll down and select “Settings.”

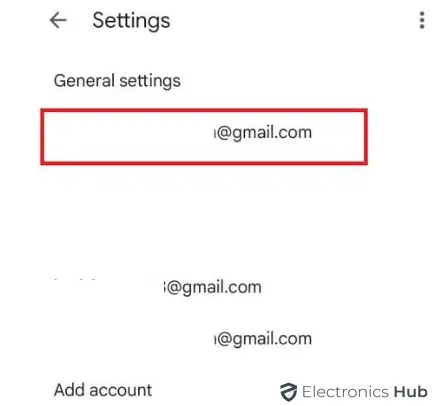
- Choose your Gmail account from the list.
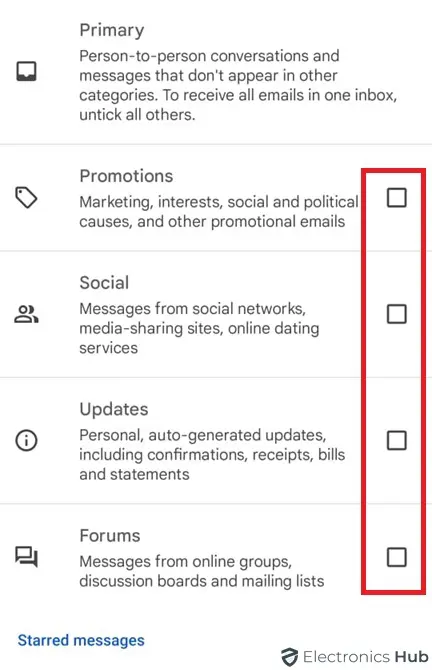
- Tap on “Inbox categories.”
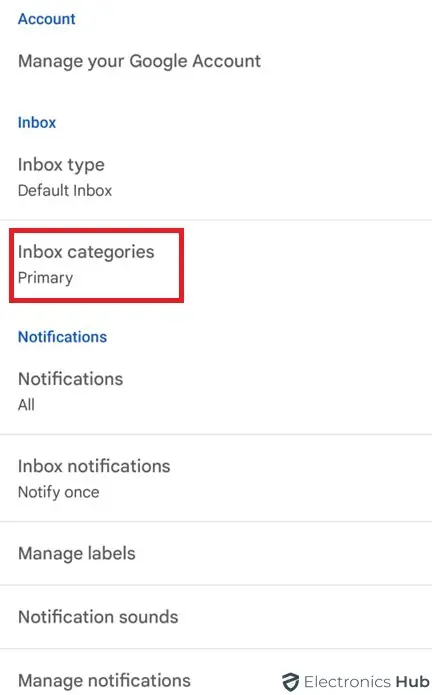
- Uncheck all the categories except “Primary.”
- Return to your inbox and tap the refresh button to display all unread emails in the Primary category.
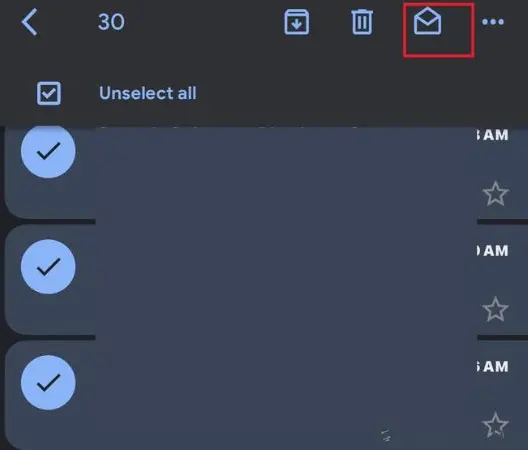
- Tap the checkbox at the top left to select all visible emails.
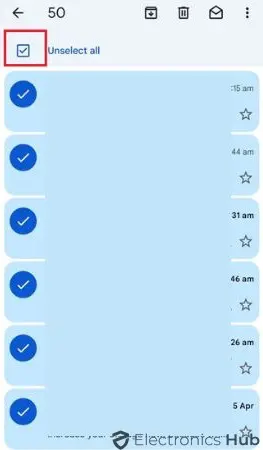
- Finally, tap the “Mark as read” icon at the top right to mark the selected emails as read.
![]()
Finally, you have successfully marked all emails as read in the Gmail app.
Using iPhone
The steps to mark all emails as read in Gmail on an iPhone are similar to those on Android:
- Open the Gmail app on your iPhone.
- In the search bar at the top, type “is:unread” (without quotes).
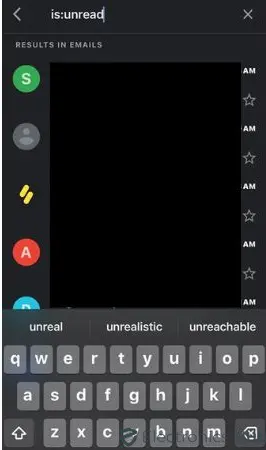
- Tap the search icon. This will show only unread emails.
- Tap the checkbox on the top left corner of your inbox. This selects all unread emails displayed on the current page.
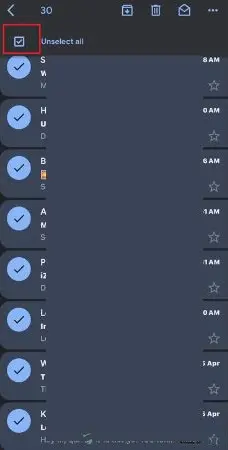
- To select all unread emails in your entire inbox, tap the link “Select all conversations that match this search” that appears below the checkbox.
- Now that all unread emails are selected, choose “Mark as read.” icon on the top right corner.
How Can You Manage Your Gmail Inbox Effectively?
Effective inbox management goes beyond just knowing how to mark all emails as read; it involves several strategies to keep your email interactions productive and organized. Here are some key tips to help you manage your Gmail inbox more effectively:
- Use Labels And Categories: Gmail allows you to categorize emails using labels. You can create labels for different projects, clients, or types of communications. This helps you quickly find emails related to specific topics.
- Set Up Filters: Filters are powerful tools in Gmail that help you automatically sort incoming emails based on criteria you set. For example, you can have all emails from a specific sender go directly to a labeled folder, skipping your inbox altogether.
- Unsubscribe From Unnecessary Emails: Reduce the volume of incoming emails by unsubscribing from newsletters or promotions you no longer find valuable. Gmail often provides an easy ‘unsubscribe’ link at the top of such emails.
- Use The Archive Feature: Instead of keeping all emails in your inbox, use the archive feature to clean up your main view. Archived emails are still searchable and accessible but don’t clutter your inbox.
- Regular Clean-Up: Set a schedule to regularly go through and clean up your inbox. This might involve deleting irrelevant emails and marking what’s left as read.
- Utilize Keyboard Shortcuts: Learn and use Gmail’s keyboard shortcuts to speed up your email processing time. For example, ‘e’ archives a conversation, and ‘#” deletes a conversation.
- Prioritize With Stars And Important Markers: Use stars or the important marker to prioritize emails. This makes it easier to see at a glance which emails need your immediate attention.
- Enable Priority Inbox: Priority Inbox is a Gmail feature that automatically sorts your emails into categories: Important and Unread, Starred, and Everything Else. This can help you focus on the most critical emails first.
FAQs:
Yes, you can use filters to automatically mark certain emails as read. Create a filter by clicking the search bar and selecting the criteria for emails you often receive and wish to mark as read. Then, choose “Create filter,” and select “Mark as read” before clicking “Create filter.”
To prevent Gmail from marking emails as read automatically, you’ll need to adjust your settings. Go to Settings > See all settings > Advanced. Here, disable the “Auto-advance” feature, which moves you to the next conversation automatically, marking emails as read as you go.
Unfortunately, there’s no built-in “undo” function for this action. However, you can quickly search for “is: unread” to find the emails you just marked as read.
If you’re having trouble marking emails as read, try refreshing your browser or logging out and back in again. If the issue persists, check for browser extensions or third-party apps that might interfere with Gmail’s functionality.
Conclusion
In conclusion, keeping your Gmail inbox tidy by marking emails as read can greatly enhance your email management efficiency. Whether you choose to do this through the Gmail app or on your desktop, the steps are simple and quick to follow. By using these methods, you can ensure that your inbox remains clutter-free, allowing you to focus more on the emails that truly matter. Give it a try, and enjoy the clarity of a clean inbox!